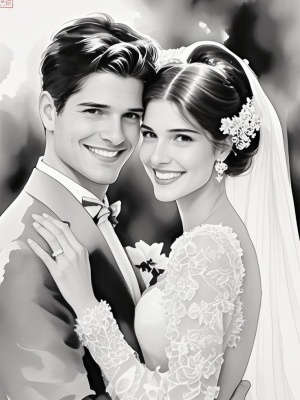
How to Paint Portraits in Acrylic: A Comprehensive Guide
Acrylic portrait painting is a rewarding yet challenging art form that requires both technical skill and creative vision. Unlike other mediums, acrylics offer versatility, quick drying times, and vibrant colors, making them ideal for capturing the essence of a subject. Whether you're a beginner or an experienced artist, this guide will walk you through the essential steps of painting portraits in acrylic, from preparation to finishing touches.
1. Preparing Your Materials and Workspace
Before diving into your acrylic portrait, it's crucial to gather the right materials and set up an optimal workspace. Acrylic paints dry quickly, so organization is key to maintaining a smooth workflow.
Essential Materials for Acrylic Portrait Painting

- High-quality acrylic paints (titanium white, burnt umber, ultramarine blue, etc.)
- A variety of brushes (round, flat, and detail brushes)
- Primed canvas or acrylic paper
- Palette and palette knife
- Water container and paper towels
- Acrylic medium (to extend drying time if needed)
For more inspiration on portrait styles, visit our gallery page featuring various artistic approaches.
2. Creating an Accurate Underpainting
The underpainting serves as the foundation of your portrait and helps establish proper proportions and values. Many beginners struggle with getting facial features correctly placed, leading to unrealistic portraits.
Solution: The Grid Method for Perfect Proportions
- Start with a clear reference photo (consider using our AI photo restoration tools to enhance old photos)
- Lightly sketch the basic shapes and proportions using a diluted burnt umber paint
- Focus on the relationships between features (eyes are typically halfway down the head)
- Establish the darkest shadows first to create depth
According to studies from the Tate Museum, artists who spend adequate time on the underpainting phase produce more accurate and expressive portraits.
3. Mastering Skin Tones with Acrylics

One of the biggest challenges in portrait painting is creating realistic skin tones. Acrylics can appear flat if not mixed properly, resulting in unnatural-looking portraits.
Problem-Solution Matrix for Skin Tones
| Problem | Solution |
|---|---|
| Flat, unnatural colors | Mix complementary colors (red + green, blue + orange) to create depth |
| Overly saturated tones | Add small amounts of complementary colors to neutralize |
| Difficulty with transitions | Use glazing techniques with acrylic medium for smooth blending |
For more advanced techniques, check out our AI painting guide which includes digital tools that can help analyze color palettes.
4. Building Layers and Adding Details
Acrylic portraits come to life through careful layering. The medium's quick drying time allows for rapid building of layers, but this can also be challenging for blending.
Effective Layering Techniques
- Start with thin washes and gradually build opacity
- Work from general to specific (large shapes to small details)
- Use a stay-wet palette to keep paints workable longer
- Employ dry brushing for texture in hair and clothing
The Metropolitan Museum of Art notes that most master portrait painters use at least 5-7 distinct layers to achieve realistic depth.
5. Final Touches and Preservation
Completing your acrylic portrait requires careful evaluation and protective measures to ensure longevity. Many artists struggle with knowing when a portrait is truly finished.
Finishing Checklist
- Step back and evaluate from a distance
- Check proportions and values one last time
- Add final highlights and refine edges
- Apply varnish for protection (wait 1-2 weeks after completion)
Conclusion
Painting portraits in acrylic is a skill that develops with practice and patience. By following these steps—proper preparation, accurate underpainting, thoughtful color mixing, careful layering, and professional finishing—you can create stunning acrylic portraits that capture both likeness and personality. Remember that every artist develops their own style over time, so don't be afraid to experiment with techniques from our AI art guide to find what works best for you.
For more artistic inspiration and techniques, explore our blog featuring various painting styles and tutorials. Happy painting!